main
How To Build Your Own DIY Electric Skateboard – A Complete Guide

Oct
Skateboards are a popular form of transportation. Although they only became commercial items in the late 1950s, skateboards first came into existence just after the turn of the 20th century. Since then, skateboards have evolved from ordinary board-and-wheel contraptions to powerful remote-controlled electronic devices in 2021.
Skateboards are a durable and convenient means of traveling short distances. They widely use them because of their portability and low maintenance. Although most people adore traveling with skateboards, they can be rather expensive.
If you can’t afford expensive ones, you can consider building your own electric skateboard. The DIY electric skateboard will cost only a fraction of the cost of a ready-made electric skateboard, and it can be a fun challenge for you. Let’s get into it.
In this article:
- DIY electric skateboard kit
- Essential parts needed for electric skateboard DIY
- Build an electric skateboard in four steps
DIY Electric Skateboard Kit
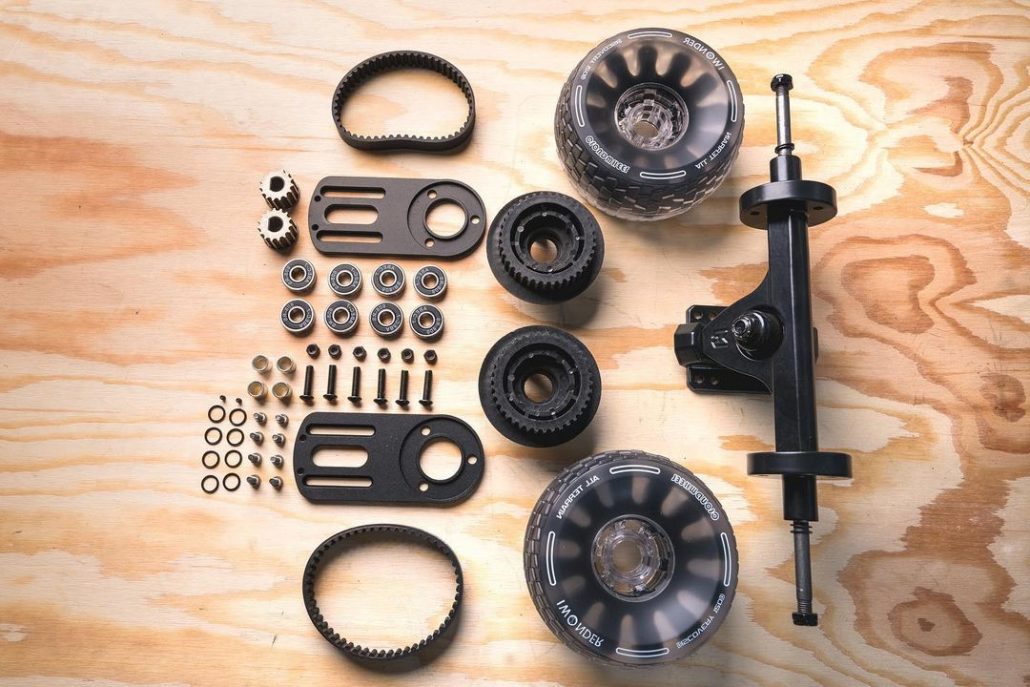
Instead of going through the stress of buying individual items for your DIY electric skateboard, you can buy an electric skateboard kit that contains all the parts you need to build your own electric skateboard.
A DIY electric skateboard kit contains all the materials you need to build an electric skateboard from scratch. Basically, it should include a deck, motor, battery, wheel, truck, enclosure, drivetrain, etc.
Buying a DIY electric skateboard kit reduces the amount of work you have to do altogether, and it also cuts down the time needed to build an electric skateboard. However, the downside of using a prepared DIY electric skateboard kit is that you don’t have the option of personalizing or installing particular parts on your electric skateboard.
Essential Parts to Build Your Own Electric Skateboard
On the other hand, if you want to buy all the parts you need for your electric skateboard by yourself, then this article will be beneficial for you.
We’ll go over all the parts you need for your DIY Electric Skateboard, including a deck, wheels, a truck, a motor, an electronic speed controller, a transmitter and receiver, batteries, drivetrain, and enclosure.
Electric Skateboard Deck
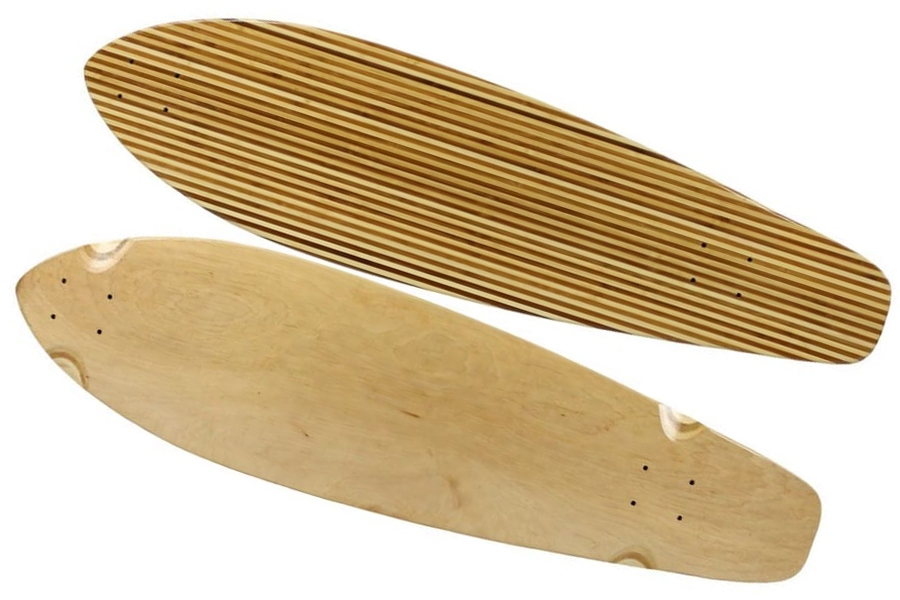
The deck of your electric skateboard is the flat part of the skateboard that you can stand on. If you refurbish your old skateboard into an electric board, you won’t need a new deck.
On the other hand, if you build your electric skateboard from scratch, you should consider the wheelbase, deck flex, and deck shape.
The wheelbase is the area under the deck where the motor, wheels, wiring, and other components of your DIY electric skateboard will be located. Before you invest in a deck, you need to consider the size of your preferred electric skateboard and whether it will fit into the wheelbase.
The deck flex signifies the amount of flexibility the deck carries. While they need some flexibility for a comfortable ride, too much deck flex can damage the motor and battery. The best deck option is flexible enough to give you a comfortable ride, yet not too loose that it would cause damage to the other components that they install in the wheelbase. You can install the motor and battery closer to the wheels to minimize damage from deck flex.
Note that the more flex your deck has, the less responsive it will be at high speeds. It is best to go for a deck with moderate flex to be on the safer side.
The deck shape affects the placement of the parts of your DIY electric skateboard, as well as how smoothly it rides. *Concave-shaped decks are great for balance and foot stability*, but the deck’s curve would make installing the motor and battery challenges.
A deck with an upward curve (camber) will be pretty flexible because of its shape. The flexibility of this type of deck makes it likely to damage the motor and battery.
I would suggest a longboard deck for its stability, smooth ride, and ample wheelbase space. The deck should be solid and have little deck flex.
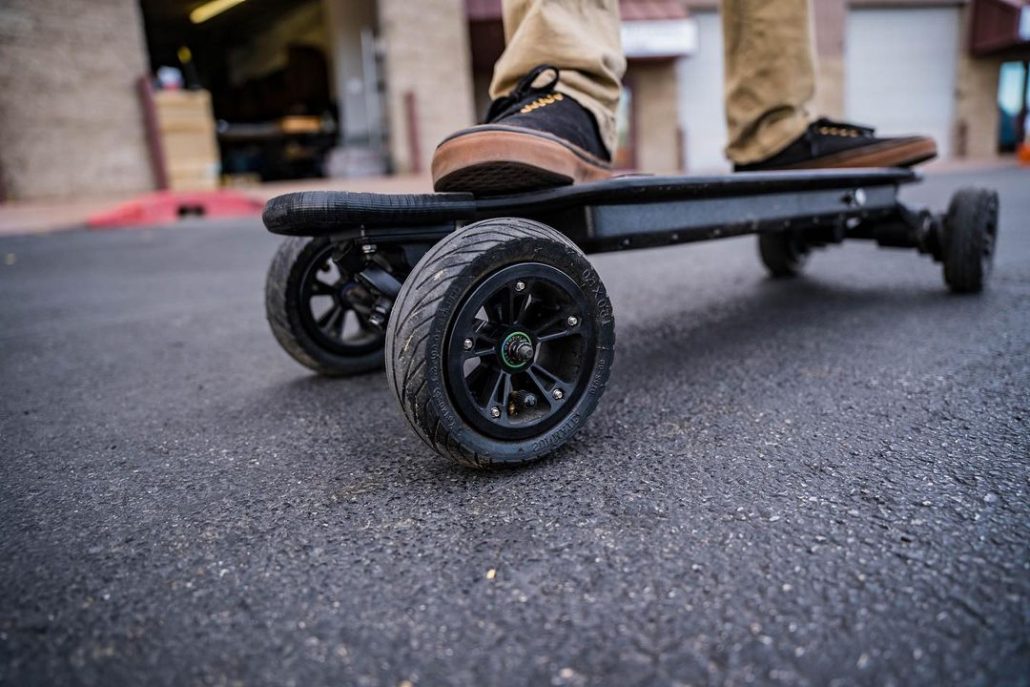
Electric Skateboard Wheels
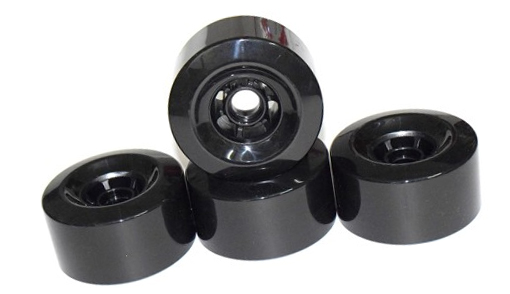
The wheels of your electric skateboard should have a large diameter and medium-range softness to ensure smooth rides. If this is your first DIY electric skateboard project, you should consider plastic longboard wheels. Plastic longboard wheels should make it easier to install pulleys on the drivetrain.
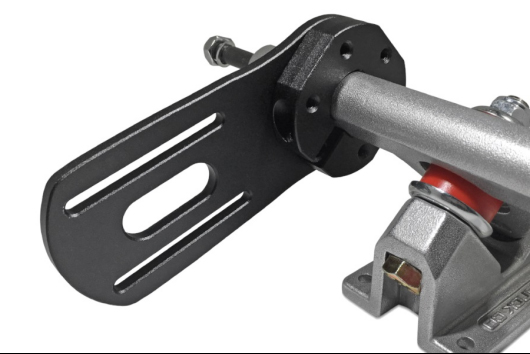
Electric Skateboard Truck
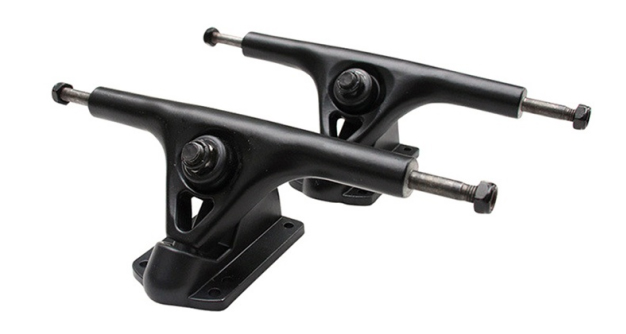
The trucks are the part of the electric skateboard that holds the wheels in place. They screw them onto the bottom of the deck. There is a large bolt in the middle of the truck called the kingpin. Longboard decks usually come with reverse kingpin (RKP) trucks. In RKP trucks, the kingpin and the bushing face outwards.
On the other hand, regular skateboards usually have traditional kingpin (TKP) trucks. If you’re going with a longboard deck, you should get a reverse kingpin truck.
Electric Skateboard Motor
First, you have to decide whether you want a single or dual motor. If this is your first DIY electric skateboard, you should stick with one powerful engine with a low kv. This setup will be able to climb hills well enough. Also, it costs considerably less.
If you decide to go for a dual motor, it will cost you considerably more. However, a dual motor is often more powerful and can climb hills way smoother than a single motor.
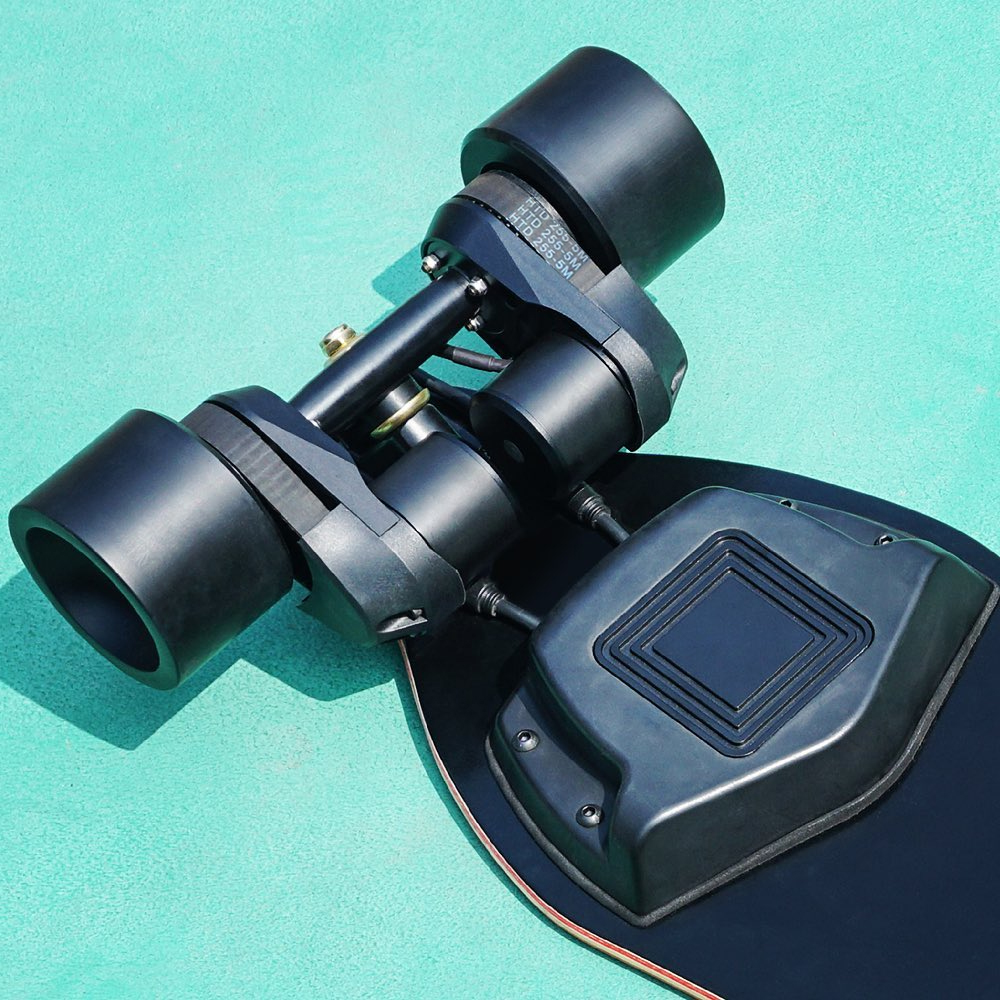
There are also two types of motors for DIY electric skateboards—belt and hub motors.
- Belt Motor

A belt motor works like a pulley system. A small gear is attached to the engine, and a piece of more extensive equipment is attached to the wheel. A belt connects both gears, and when the motor turns the small gear, the small gear pulls the belt, which causes the larger gear and the wheel to move.
Belt motors will be your first option if you want a DIY electric skateboard with better acceleration and climbing ability.
But you should realize that the DIY e-board with belt drives will be hard to move with foot power once the battery dies. Its moving parts indicate more chances for some parts to break. Besides, belt motors are more difficult to install. You should take care while assembling the parts for a belt drive. Every part needs to be appropriately aligned, and the gear should be fixed as firmly as possible with bolts.
- Hub Motor
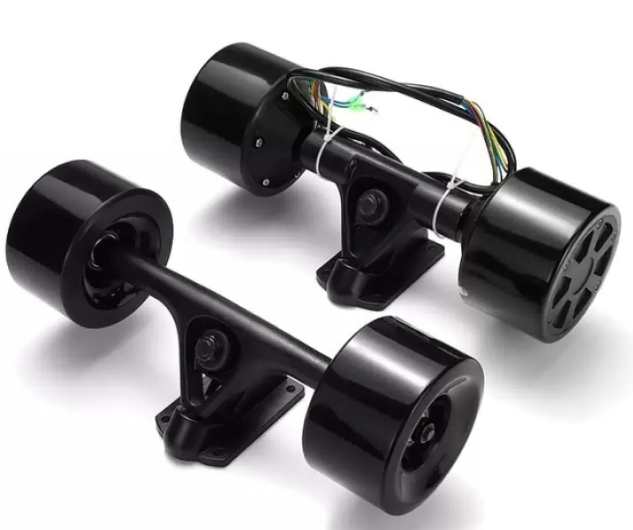
As to a hub motor, it directly attaches the motor to the wheel. Sometimes the motor is embedded in the wheel, and other times it is connected by gears that move the wheel when the engine starts.
If you want a motor easy to install, DIY electric skateboard with a hub drive will be the best choice. It’s a quiet motor to preserve the battery life. Because most hub motors come with their own trucks, you don’t have to worry that you carelessly bought mismatched wheels and trucks.
However, despite easy installation, hub motors for a DIY electric skateboard also have some drawbacks. For instance, you will have fewer choices of wheels as many hub motors are embedded in the wheel. In addition, hub drives are less durable than belt ones because they’re more likely to overheat.
Electric Skateboard ESC
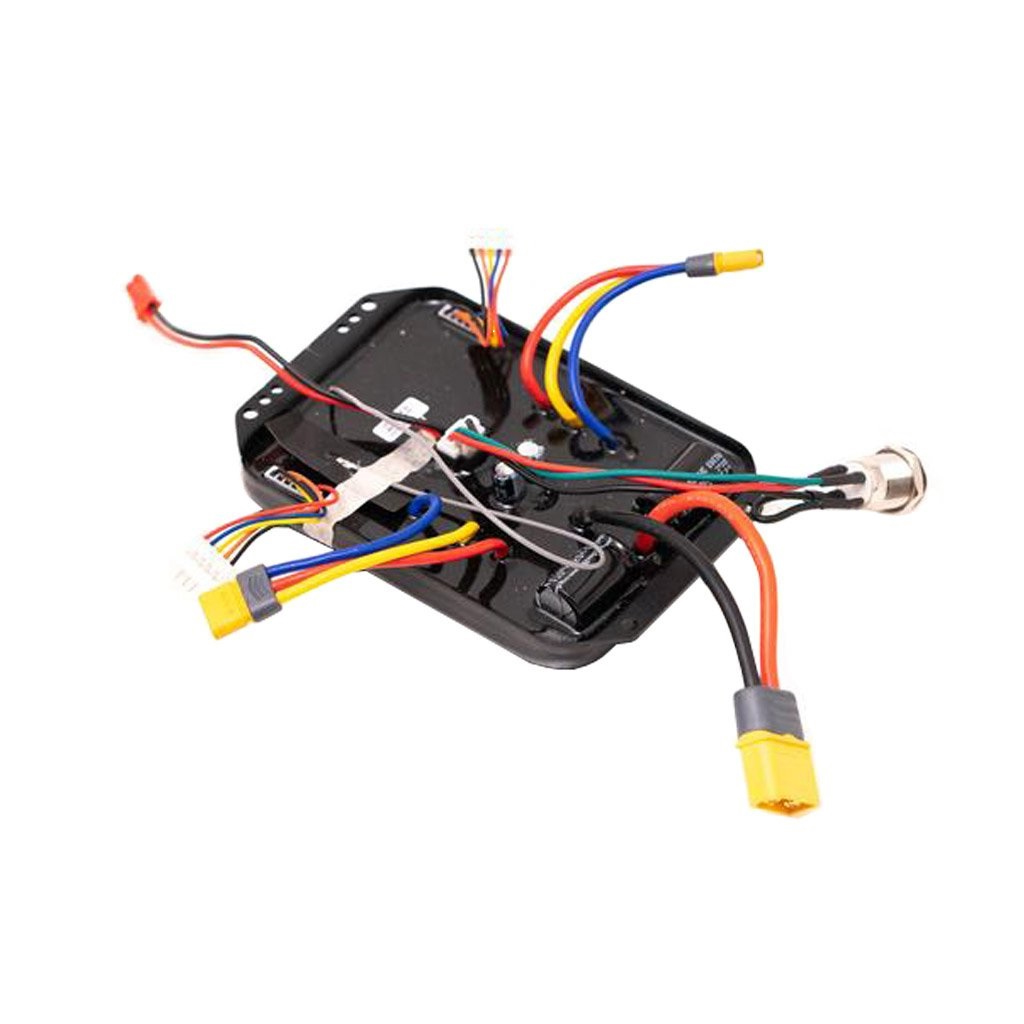
The ESC is the controller for the DIY e-board. You might assume that it isn’t an essential part of your homemade skateboard, but you would be wrong. When in the market for an ESC, don’t just buy the least expensive (and probably least quality) ESC. Low-quality ESCs tend to burn out sooner rather than later.
Look for the type of ESC that you would find in a car. These are usually of good quality. Although they cost more, they last for way longer. Also, keep an eye out for ‘HV’ in the name of your ESC. It denotes that the ESC supports high amps.
Electric Skateboard Transmitter and Receiver
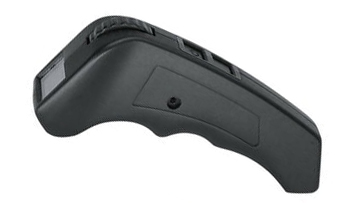
Sometimes, the ESC package also includes a transmitter and receiver, so that’s a done deal. If it doesn’t, you can buy a controller at an affordable price pretty much anywhere. You only need to consider the controller’s battery life and how many channels you want it to have. The package will contain installation instructions.
If you are looking to save money, you can use any RC controller you have lying around. RC controllers work fine with electric skateboards.
Electric Skateboard Battery
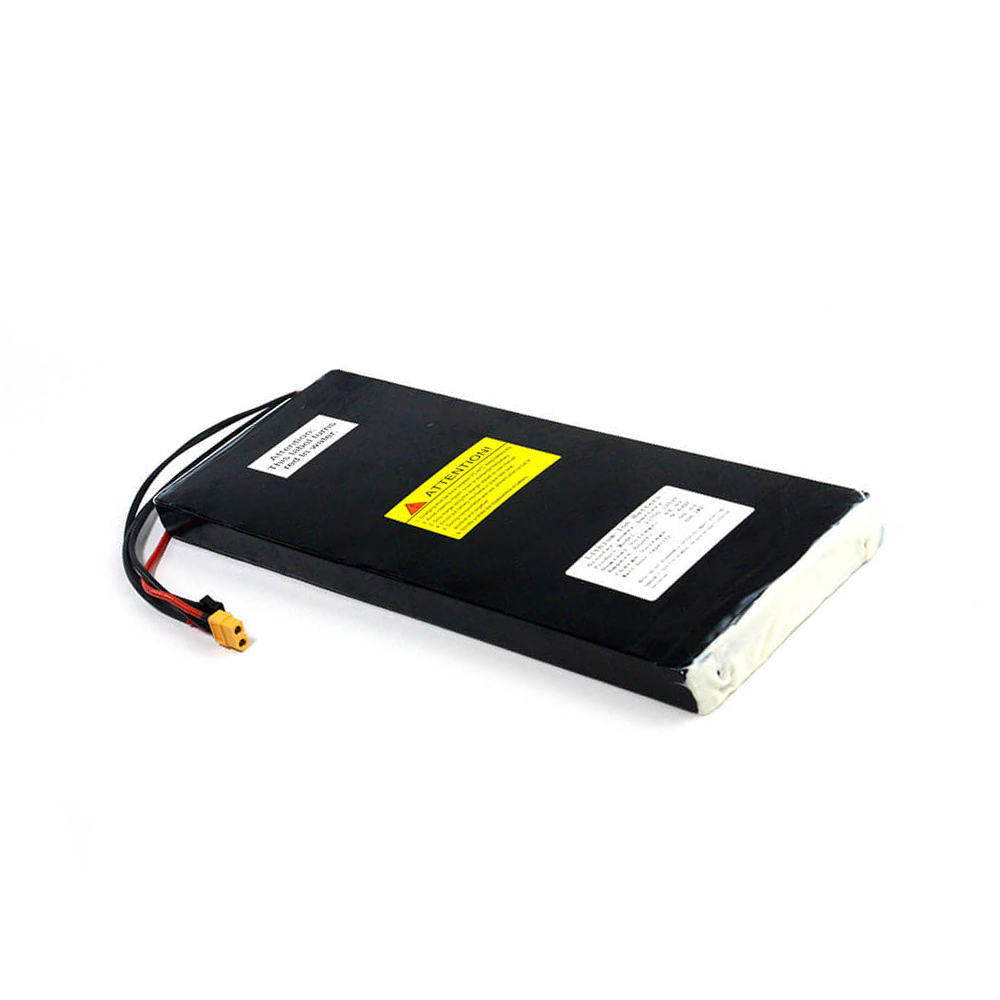
Most people use lithium-ion polymer batteries for DIY electric skateboards. This type of battery is small but carries a tremendous amount of power. The main pro of using the lithium-ion polymer battery is the amount of energy despite its size. However, you need to manage this battery very carefully because it is prone to explode and start a fire if they do not adequately handle it.
Nevertheless, the lithium-ion polymer battery is manageable if not overcharged, undercharged for an extended period, or charged using the wrong charger.
If you need a cheaper and more stable alternative, you should consider the regular lithium-ion battery. The lithium-ion battery life is less than the lithium-ion polymer battery, but it works well enough and is easier to manage.
Related: electric skateboard battery
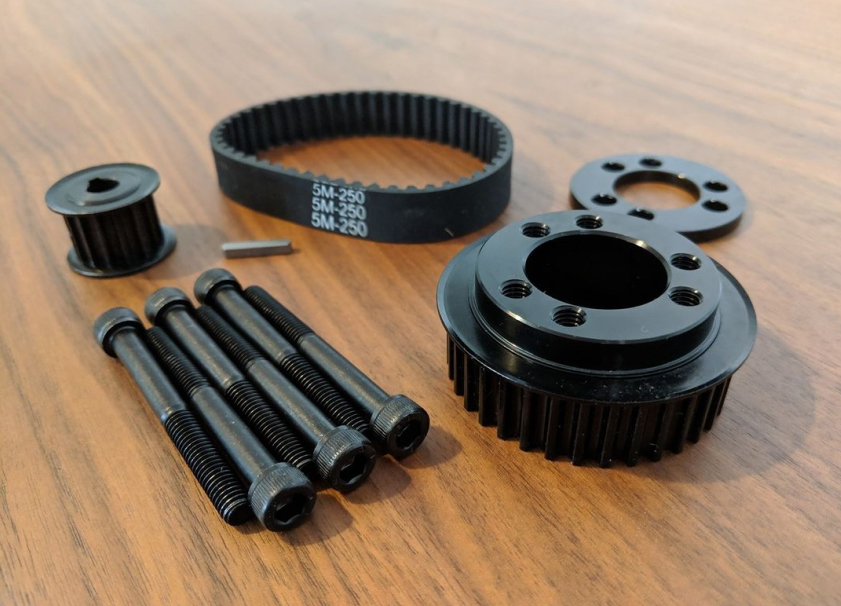
Electric Skateboard Drivetrain
The drivetrain consists of four different parts that work together to transmit power from the motor to the wheels of the DIY electric skateboard. The drivetrain parts are the motor pulley, the wheel pulley, the drive belt, and the motor mount.
Before collecting the drivetrain components, you need to measure the size of your motor(s) and wheels because the dimensions of your drivetrain, motor, and wheels have to be in the correct proportions. Also, you need to know your engine’s RPM to calculate your Gearing Reduction Ratio. It should enable you to reach higher top speeds.
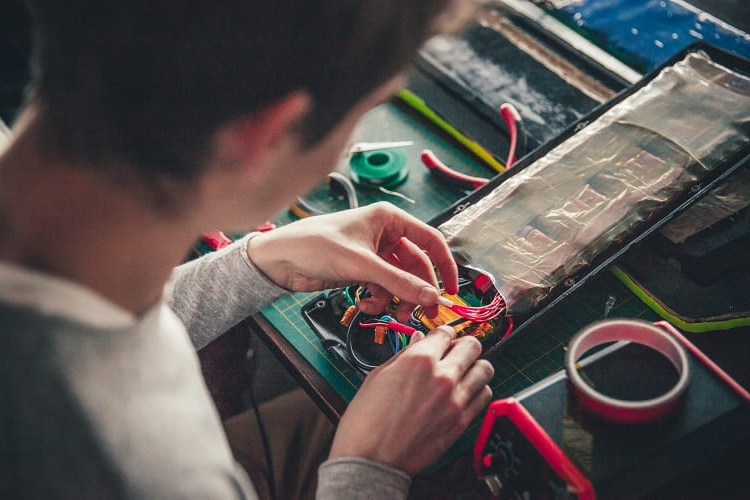
Electric Skateboard Enclosure

The enclosure of your electric skateboard keeps your motor, battery, wiring, ESC, receiver, and receiver pack safe. The section should be made out of sturdy material to protect the components of your DIY electric skateboard effectively.
The enclosure should also be breathable to avoid overheating. Manufacturers typically make sections of aluminum, plastic, or similarly durable materials, which are punched through holes to allow air movement.
How To Build A DIY Electric Skateboard
Before you start, place your deck top-down and put all the components of your electric skateboard where they are supposed to go to make sure that everything fits appropriately. Once you have confirmed that the pieces work, you can start the installation.
Step 1
First, prepare the motor. The process is pretty easy because the engine is attached to the wheel when using a hub motor. All you have to do is make sure that your wheel fits on your truck. If it does, you can fix your wheel to the car like you would attach any other wheel.
If you are using a belt motor, the process is significantly more complicated. When fixing the engine to the motor mount, you should position the support on the truck to decide the best spot to fix the motor where it won’t get in the way of your wires. You can use thread lock glue on the screws that fasten the engine to the mount for a stronger hold.
You need to drill a hole into the wheel to attach the pulley gear. Some wheels are pre-drilled, so that will make your work easier. You should also add some thread lock glue to the screws you use here.
Step 2
Place the motor in its position, insert the screw, and tighten it a bit. Then, put the pulley belt on the engine, fix the wheel onto the truck, and attach the pulley belt to the wheel while rotating the wheel slowly.
After doing that, you can install your wheel and trucks the way you would install them on a regular skateboard. After installing your wheels and trucks, you can continue to install your battery and ESC.
Step 3
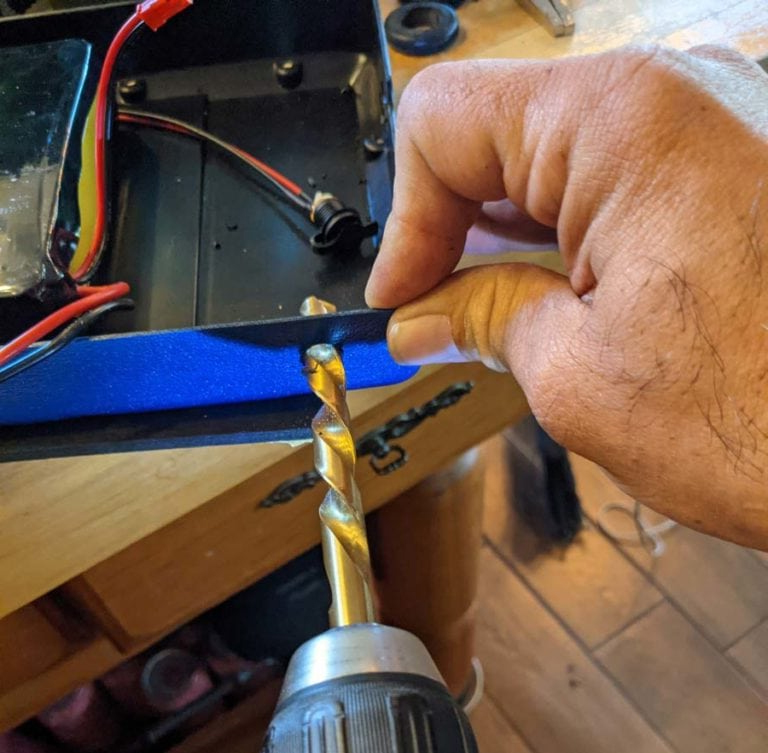
For the wiring, you’ll have to drill some holes into your case for the enclosure. Start the holes small and widen them bit by bit to avoid making cracks in the plastic. If your section will cover the power switch and charging port, you should make holes for them too.
Before drilling, place the enclosure case where you want it, clamp it down, and start shooting. Put screws into the holes you prepare to keep the case stationary.
Step 4
Next, fix the ESC and the battery into place and link the charge port and the battery. Then, connect the power switch to the ESC and the battery to the ESC.
Now that most of the parts are fixed onto the deck, you can start repairing the wires of the motor through the holes you drilled into the enclosure case. It would help if you connected the motor wires to the ESC. Before affixing the enclosure to the deck, make sure that everything works properly.
Run a Test
To test if the DIY electric skateboard is working, hold down the controller on your throttle. If you wire your e-board correctly, the motor should start, and your wheels should start spinning.
As long as the motor starts, you can screw down the enclosure case and start using your homemade electric skateboard. But remember to wear a helmet for your test.
In addition, if you got a DIY electric skateboard kit, the package will include instructions on how to build an electric skateboard. If instructions in your manual differ from those in this article, it is better to follow the manual of your DIY kit.
Conclusion
Electric skateboards are the easiest way to move around, but they might be inaccessible for random people because they can get expensive.
Making your DIY electric skateboard is far cheaper than getting a new one and a whole lot of fun too. If you want an electric skateboard but cannot afford one, this is all the information you need to make your DIY electric skateboard. Get building!
What Next?
Now since you have learned something about DIY electric skateboards, why don’t you also check out our other related guides as follows:
- Electric skateboards under $500
- Guide on riding an electric skateboard
- E-skating laws in different states
- Fastest electric skateboards