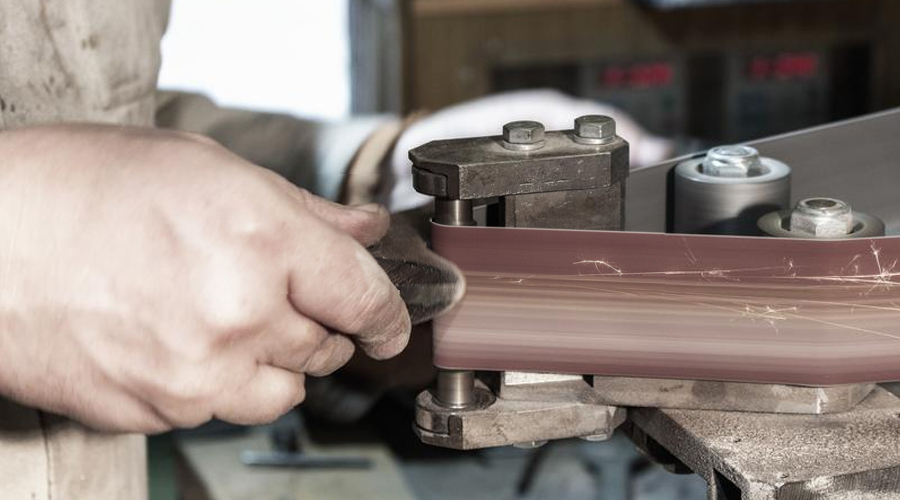
belt grinder
How to Use a Belt Sander –The Faster and Easier Way
Oct
If you are looking to start using a belt sander or are already using one, but you don’t quite understand the appropriate use, this article is for you! Now, if you have just gotten yourself this powerful tool, you need to make sure that you know how to properly use it to engage this tool into its full potential and get the exact results you want. Furthermore, while using such powerful tools as a belt sander, you need to know precisely what you are doing since you can completely ruin the project and hurt yourself if you are not careful with it. Therefore, this article will briefly explain the proper use of a belt sander, how you can use it, and what precautions you can take to avoid making mistakes.
What is a Belt Sander, and What Can You Use It For?
Belt sanders can be used for many purposes. Still, commonly they are used to trim along lines, rough sand surfaces to make them smooth, leveling different surfaces like a hardwood floor, and can easily be used in a freehand way to give shape or round off a material.
Belt sanders can be pretty forceful; therefore, they can remove a significant amount of material in a concise amount of time. Consequently, they produce a good amount of dust. Belt sanders come with a dust collection system, mainly a bag that can be attached to the dust outlet, and this can prevent the dust from ruining the whole workplace. A big variation of sizes and power can also be found among belt sanders. The smaller units are usually used by people who are just getting into it, while professional employees prefer some bigger units.
Belt sanders can be used to perform many different tasks, including:
- For example, it can be used to trim a surface to the desired depth.
- You can also use it to smoothen a surface of a tabletop or deck. To do this, you may have to use a coarse grit in the beginning and gradually move towards the finer one.
- To remove any residue or paint from the wood.
- To create curves and rounds on wood surfaces.
- You can even use belt sanders to sharpen up tools like axes and chisels. (Don’t forget to remove the sand collection bag while doing this since it can make some sparks during the sharpening process)
Another interesting fact that you should know is that belt sander isn’t just for wood surfaces; you can also use it with other materials such as aluminium and use it as you please.
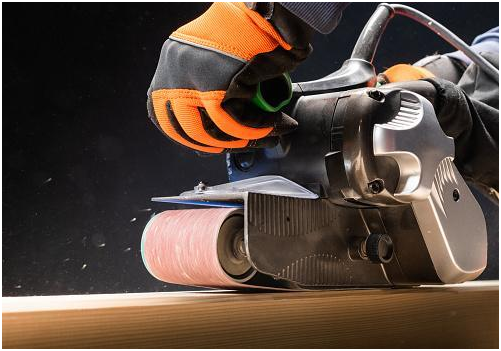
How to Use a Belt Sander
A nonpareil quality of a belt sander is that it moves linearly, allowing the worker to perform sanding with the grain with absolutely perfect results, even if they use coarse grit. While belt sanders aren’t exactly something a hobbyist woodworker would own in their house, every experienced carpenter or crafter usually owns one. Belt sanders are incredible power tools that are essential for saving time and create great results. Belt sanders can be used for various and multiple different tasks, but they are specially built for some specific tasks that they excel at. Scribing is a method to form a curve gradually. By using a belt sander, scribing can be so much quicker and easier than it is. We will tell you how to use a belt sander properly and get the best results in a quick step-by-step guide!
Step 1. Choose the right belt!
Depending on the task, you will always need a belt of different grit and direction. Start with a coarser grit that will make the initial process of wood removal easier. Then, gradually work up to finer grits, for example, 180. By the time you’re applying finishing touches, use the finest grit to get the best and smoothest result, as well as protect the grain beautifully.
Step 2. Insert the belt
To insert the belt into the sander, slide it onto the wheels. The lever to loosen and tighten the belt is usually found on the opposite side.
Step 3. Secure your Project
To prevent any slipping while you’re working, ensure that your project is clamped and appropriately secured.
Step 4. Sand the wood
Turn your sander on. To make sure that the cut is fine and smooth, wait for the sander to reach full speed. Then, gently touch the sander on the wood, starting from the rear end of the belt. Keep your motion even and constant to ensure smooth results. Switch grits for finer sanding. Like any other power tool or equipment, belt sanders need to be maintained correctly to function at their best. So the first thing to always ensure is that the belt is aligned perfectly. Some belts need to be installed in a specific direction, while some can be installed both ways. Next, to ensure that the belt is secure and orientated correctly, turn on the sander, hold it up, and watch it move, making sure it is not rubbing anywhere in the wrong way or rolling off. Next,
regularly check and empty the ventilation bag. And to finish off, take the belt off when storing the belt sander.
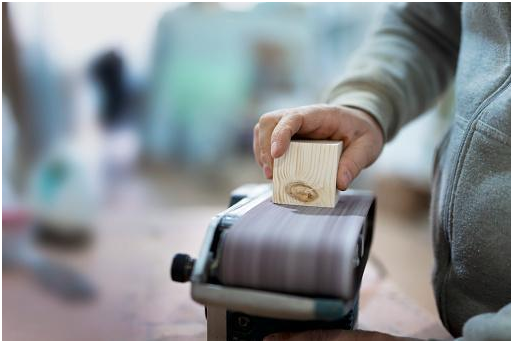
How to Use a Stationary Belt Sander
A stationary belt sander is vastly different in structure from a regular belt sander. While their purpose is similar; to sand down wood, they work in quite a different way. Unlike a traditional sander, stationary belt sanders can be attached to a workbench or a sawhorse. In addition, due to their size and the stationary aspect, they are more powerful and efficient. However, the most significant advantage of a stationary sander is that you can use both your hands to guide the wood while the sander remains stationary. This makes the sanding more precise as well as easier to control.
Step 1: Clamp the Workpiece
Starting on your project, the first step is to prepare your wood. Secure the wood properly despite its length. If the wood isn’t secured properly, it will most properly move and wobble during the process of sanding it. These movements will end up making the sanding process difficult and uneven. Therefore, it is highly recommended to properly secure your project before moving on to sanding it.
Step 2: Wear Protective Gears
The next step is to ensure your safety. Woodworking and sanding create a lot of dust which can hurt your eyes. You also need to protect your hands in case of any mishandling. In most belt sander kits, safety is included. You should always wear protective eyewear and gloves while working with sanders.
Step 3: Start the Motor
Before turning on the belt sander, always make sure to keep it away from the wood. For optimal sanding, the sander needs to be running at full speed. Depending on the type of wood, you always need to work with a different grit. However, you should always start with a coarser grit and move the finest grit you will use on the project. Now, turn the sander on and start sanding!
Step 4: The Right Grip
Most sanders come with a handle; if not, then they at least have a protective covering for you to grip the sander. When you’re sanding, the grip matters a lot and. When starting to sand, bring the rear part down on the wood first and make sure that you have a sturdy and firm grip on the handle. Keep the grip steady for smoother sanding.
Step 5: Move the Sander
The sander and the belt work on their own. All you have to do is keep moving the sander in smooth motions and ensuring a firm grip. Always be careful with applying pressure since too much pressure can result in dents and depressions in the wood. This will make sure that your wood receives a smooth sanding. If your goal is to remove wood paint, work along the grain and use coarse grit.
Step 6: Sand it!
Now that you are aware of all the steps. You can start sanding your wood. Just keep a steady motion of the back and forth movements while applying even pressure. The more even and smoother motion you maintain, the smoother the wood will be.
Safety Precautions:
- For your protection, make sure that you cover your ears!
- Ensure that the sandbag is safely secured and none of the dust particles is inhaled by you. They don’t taste bad or unpleasant; they are just severely harmful to you. Furthermore, you should always wear a face mask while using a belt sander.
- Once you are done using the tool, always unplug it. This might seem very mundane advice, but trust us, you don’t want to end up with a scar.
- You have to be extra vigilant when working with steel or metal because it will make a lot of sparks. These sparks might ignite a fire in the sand dust if not cleaned up properly.
- Before you plug in the belt sander, make sure that the button is in the off position, or else it will start promptly, giving you no time to properly handle it.
- Belt sanders apply a lot of pressure to the work. As a result, if your project isn’t held firmly, it will drift away from or into you. Clamps indeed tend to get in the way, but a quick and easy stop point on the workpiece’s suitable edge will retain it from scooting. Pick a significantly narrow point than the workpiece to ensure that the sander clears it at the edge.
Belt Sander Basics: Tips and Techniques
There are mainly two basic operations when it comes to belt sander. First, you need to follow some protocols before pulling the trigger, while some of them need to be followed after the trigger is pulled.
Before Pulling the Trigger Tips:
Tip 1:
Whatever you are working with, if you go for very cheap tools, you might not get the exact results or fine smoothness. Always remember that the project will only be as good as the tools being used in it.
Tip 2:
When choosing sandpaper, always go with the one that is appropriate for your project. You cannot use the same quality of sandpaper for every material and project.
Tip 3:
Before you start working, make sure that the platen transition is not sharp or uneven. If the edge is sharp, it might press on the sandpaper in your workpiece and make it harder to sand it properly.
Tip 4:
You might need to lubricate the aluminium tube connected with the dust bag since it must rotate freely to function correctly. If not, the point of the connection might get sticky and can cause hindrances in the rotation.
Tip 5: If sand dust keeps clinging to your safety glasses, you can use drier sheets to clean them, and it will stop the particles from sticking to the glasses.
After Pulling the Trigger Tips
Tip 1:
Once you have pulled the trigger, make sure that the belt sander keeps running flat. If it starts digging on one side or another, this will cause a divot, but if it’s flat, it’s bound to keep running smoothly,
Tip 2:
When you start working on a piece, begin with sanding the flatter surface and gradually move towards the places that need more attention.
Tip 3:
Don’t just move your workpiece back and forth. Instead, try making diagonal strokes from side to side and front to back as well. By doing so, you will manage to get a smoother surface.
Tip 4:
When working with a sander belt, you don’t need to push the belt into your workpiece to cut it. All you need to do is pull the trigger, hold the handle, and just set the sander on your project. If you put in too much weight, you might end up making a dent.
Tip 5: Don’t pull back the sander completely and only cut the surface with the edge of the sander belt. This will cut off wood more than you wanted to, and you will have to build it up again.
Other Tips and Tricks
- Always stand with a little bit of space between you and the belt sander, or else you will up with a stuck-up piece of your cloth. Make sure that your sleeves are rolled up and your zipper isn’t down either. Finally, tidy up the hair and make sure nothing comes in the way.
- Always use protection for the ear and eyes.
- Firmly hold the belt sander against your workpiece. It is a powerful machine, and if it’s held in a lousy way, you might end up ruining the project or hurting yourself.
- Keep the belt sander clean at all times. You can use a cleaning stick to get rid of the dust particles.
- You don’t have to lift the sander once you are done sanding and edge to move towards another side. Just go in the opposite direction with the zigzag motion, and it will be as smooth as ever!
FAQ
How to Put Sandpaper on a Belt Sander
A belt is held in place using tension. The release lever is usually found on either side of the belt sander. Simply pull the lever, and the bolt comes loose. You can then pull it off and replace it. Ensure that the belt is in the correct direction as well as appropriately aligned. Use the knob on the side to adjust the alignment of the belt.
How to sand hardwood floors with a Belt Sander
Use a fine grit to sand hardwood floors. Hardwood floors aren’t hard to sand; all you have to do is maintain constant motions and avoid applying pressure. Luckily, by using a fine grit, the chances of damaging the hardwood surface are little to none.
How to remove paint with a Belt Sander
For sanding paint, you need to use a rough grit belt. Make sure that you’re moving along the grain of the wood rather than against or perpendicular. As soon as you notice that the surface underneath the paint is visible, switch to a less rough grit but not quite fine. Continue sanding the paint away until the bare wood is visible. Then, go over the surface with your finest grit for a smooth surface.
How to Use a Belt Sander on a Door
For heavily painted doors, put on a coarse 60 grit on the belt sander. Start chipping away at the paint in a smooth motion. This will help you get rid of the paint layer as well as any chips or splinters. Once you’ve gone over the door a couple of times, switch to a finer grit for finer results. Make sure to apply uniform but light pressure for a smooth finish. Finish off by wiping down the door and applying a thin layer of varnish.
Final Words
One of the most complicated tools to master is the belt sander. The user experience plays a significant role in achieving a good result. This is why getting the technique right will take a lot of trial and error.
Take some time to practice on scrap wood before starting your actual project. Use your belt sander for sanding them down, and use a level to see if you did a good job. With just a little bit of practice, you will be able to excel at this skill.