Surfboard
How to Paint Your Surfboard
26
Jul
Jul
A good surfboard is indispensable for a surfer to excel in the surface water sports of surfing. It leads surfers to put special efforts into the surfboard’s design, strength, and light weightiness. A surfer’s ultimate aim is to achieve better functionality for surfboards, which could help surfers excel in sports.
The craze for improved surfboards is equally abundant among the amateurs as well as the professionals. The design and painting patterns of a surfboard show the personality of a surfer. Also, it portrays the passion of a person towards surfing, which pushes surfers to go for painting their surfboards. Apart from this, surfboards come with a fixed paint design and with limited color availability.
Due to this, a passionate surfer is sometimes stuck to buy a surfboard against his desires. Ultimately, the surfer goes for painting. People also want to paint their surfboards because they are either their favorite ones or their first surfboard. Similarly, sometimes everything in a surfboard is fine, but its painting is not good enough. So, people go for a paint change for such surfboards. People also look for painting their surfboards to have a change of look of their surfboard.
If your desired paint style is hard to find in the market, you should not worry. You are not the first one going through this situation.
Now, you might get worried that the paint done by you might be of low quality. That is a valid question. However, here are some essential steps that can ensure your surfboard is painted the right way.
 10. Apply paint now
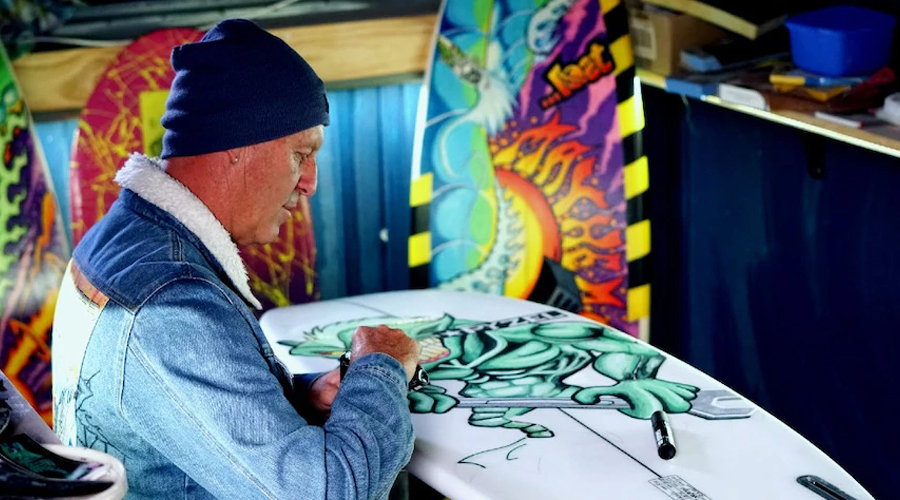
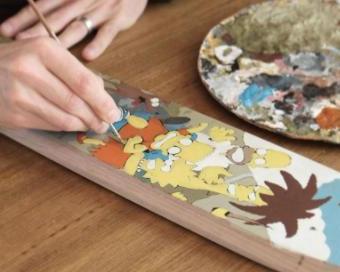
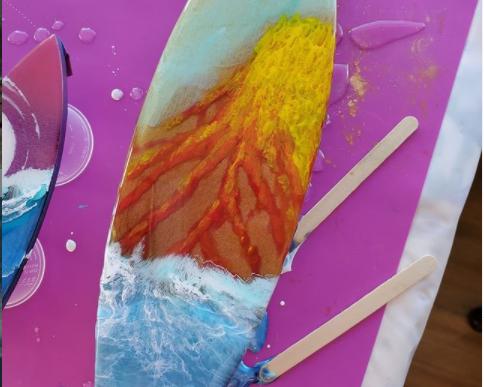
Now, you are all ready to apply paint on your surfboard. First, wear the safety apparatus and then start applying the paint as per design. You are advised to apply a consistent amount of paint on the surfboard where the painting is required. At the same time, you should carefully apply paint in the taped area as well.
You should make sure that you apply a fair amount of paint layers until the final desired color is achieved. While doing this, you can apply one coat of paint on the surfboard surface and then leave it for some time to dry. Once a coat of applied paint is dry, you can apply the next coat of paint. It would help if you kept doing this until the painting looks good. You can use regular paint, paint pens, and spray paints as per your liking and availability.
If you apply paint after doing the things mentioned above, the painting will be one tone and stick to the surface of the surfboard exceptionally.
11. Avoid dark colors such as black
You must avoid dark colors on your surfboard. Dark colors such as black will absorb heat from the surroundings, leading to damage to the surfboard. Therefore, you should apply cool colors so that your surfboard is lasting as well.
12. Let the paint dry
Now, you must allow the applied paint to dry for several hours. Usually, you should leave a paint design to dry for 24 hours.
Paint is an essential part of a surfboard design. The standard paint designs are not suitable for and liked by everyone. Also, even if someone wants a particular paint design, the passage of time and the wear and tear linked with it makes the old paint look terrible at some point. So, doing paint on surfboards becomes inevitable for surfers. Above is a step-by-step method or guide that tells you exactly how to approach the painting of your surfboard. The process of painting surfboards is fast and requires very little investment. It is worth a try as it could turn a regular surfboard into a personalized surfboard for yourself. You can also learn many other things and skills if you want to during the painting process.
10. Apply paint now
Now, you are all ready to apply paint on your surfboard. First, wear the safety apparatus and then start applying the paint as per design. You are advised to apply a consistent amount of paint on the surfboard where the painting is required. At the same time, you should carefully apply paint in the taped area as well.
You should make sure that you apply a fair amount of paint layers until the final desired color is achieved. While doing this, you can apply one coat of paint on the surfboard surface and then leave it for some time to dry. Once a coat of applied paint is dry, you can apply the next coat of paint. It would help if you kept doing this until the painting looks good. You can use regular paint, paint pens, and spray paints as per your liking and availability.
If you apply paint after doing the things mentioned above, the painting will be one tone and stick to the surface of the surfboard exceptionally.
11. Avoid dark colors such as black
You must avoid dark colors on your surfboard. Dark colors such as black will absorb heat from the surroundings, leading to damage to the surfboard. Therefore, you should apply cool colors so that your surfboard is lasting as well.
12. Let the paint dry
Now, you must allow the applied paint to dry for several hours. Usually, you should leave a paint design to dry for 24 hours.
Paint is an essential part of a surfboard design. The standard paint designs are not suitable for and liked by everyone. Also, even if someone wants a particular paint design, the passage of time and the wear and tear linked with it makes the old paint look terrible at some point. So, doing paint on surfboards becomes inevitable for surfers. Above is a step-by-step method or guide that tells you exactly how to approach the painting of your surfboard. The process of painting surfboards is fast and requires very little investment. It is worth a try as it could turn a regular surfboard into a personalized surfboard for yourself. You can also learn many other things and skills if you want to during the painting process.
Essential Steps for Painting Your Surfboard
1. Arrange basic safety measures You must arrange basic safety and security measures as the first and the foremost step. This include:- Use of mask
- Eyeglasses
- Gloves
- Wet paper towels
- Wax comber
- Acetone ( don’t use nail polish remover as it could lead to low quality of paint)
- Sandpaper ( 200 to 250 girt)
- Acrylic paint
- Spray color cans
- Other colors as per your personalized paint design
- Brushes in all different sizes
- UV resistant color coat spray
10. Apply paint now
Now, you are all ready to apply paint on your surfboard. First, wear the safety apparatus and then start applying the paint as per design. You are advised to apply a consistent amount of paint on the surfboard where the painting is required. At the same time, you should carefully apply paint in the taped area as well.
You should make sure that you apply a fair amount of paint layers until the final desired color is achieved. While doing this, you can apply one coat of paint on the surfboard surface and then leave it for some time to dry. Once a coat of applied paint is dry, you can apply the next coat of paint. It would help if you kept doing this until the painting looks good. You can use regular paint, paint pens, and spray paints as per your liking and availability.
If you apply paint after doing the things mentioned above, the painting will be one tone and stick to the surface of the surfboard exceptionally.
11. Avoid dark colors such as black
You must avoid dark colors on your surfboard. Dark colors such as black will absorb heat from the surroundings, leading to damage to the surfboard. Therefore, you should apply cool colors so that your surfboard is lasting as well.
12. Let the paint dry
Now, you must allow the applied paint to dry for several hours. Usually, you should leave a paint design to dry for 24 hours.
Paint is an essential part of a surfboard design. The standard paint designs are not suitable for and liked by everyone. Also, even if someone wants a particular paint design, the passage of time and the wear and tear linked with it makes the old paint look terrible at some point. So, doing paint on surfboards becomes inevitable for surfers. Above is a step-by-step method or guide that tells you exactly how to approach the painting of your surfboard. The process of painting surfboards is fast and requires very little investment. It is worth a try as it could turn a regular surfboard into a personalized surfboard for yourself. You can also learn many other things and skills if you want to during the painting process.