main
How to Make a Tattoo Gun?
Sep
Top 10 Steps to Making a Tattoo Gun / Tattoo Gun – Create A Customized Tattoo Machine to Express Your Art
Tattoo artists are innovators. Most of them make a tattoo gun on their own or change the existing equipment to suit their specific needs. The customized tattoo machines help these artists perfect their art.
Gaining knowledge about making a tattoo gun will help you create the perfect tattooing tool. You can then perfect your tattoo art with your very own creation.
Prepare: Materials You Need
Before you create a tattoo gun, you need to choose the perfect equipment. A good tattoo artist understands the importance of having suitable materials to make the tattoo machine.
Different types of materials get used to making a tattoo gun. A wrong choice of materials will complicate the process, and you will not get the desired results.
Irrespective of whether you have experience as a tattoo artist or starting new, you need the best materials to showcase your unique tattoo skills.
- Electric Motor or Rotary Motor.
- Toothbrush or Teaspoon.
- A BIC Pen or A Mechanical Pen.
- Black Electrical Tape.
- Guitar String.
- Pliers.
- Scissors.
- Multi-Power Supply.
Electric Motor or Rotary Motor – The first component you need to make a tattoo gun is the electric motor or the rotary motor. It is best to choose a motor that runs on at least 12 volts of power.
Eighteen volts of power is the ideal choice as it ensures that the motor runs better.
Toothbrush or Teaspoon – The toothbrush or teaspoon gets used to designing the brace. The brace supports the tube when it gets fixed to the motor.
BIC Pen or Mechanical Pen – The BIC pen or mechanical pen gets used to creating the tube. The tube is an essential component as it helps guide the needle.
Black Electrical Tape – A good-quality electrical tape gets used to secure the motor to the brace.
Guitar Strings – The guitar strings get used to making the needle for the tattoo machine.
Pliers – The pliers help fold the needle base so that it fits into the tube.
Scissors – The scissors get used to cut the guitar string.
Power Supply – You can use a plug-in adaptor or a phone charger, or any other power source for the power supply.
Now that you know the different materials and their unique uses, we will guide you through making a tattoo gun step by step.

Step 1: Finding the Ideal Motor
The first step in making a tattoo machine is to find an ideal motor. You can choose a rotary motor or an electric motor that runs on 12 volts. If you want the most amazing results, you can select a motor with 18 volts.
Most motors have a small shaft that tends to protrude from the center. You will need a small button, preferably with four holes. Make use of super glue to attach the button to the shaft of the motor.
Avoid using too much super glue. When you use a lot of glue, it seeps through buttonholes and blocks them. You need to ensure that the holes are open as you will attach the needles through them.
After you complete the process, you can keep it separately to dry.
Some tattoo artists prefer to use an eraser instead of a button. Most mechanical pens have erasers, and you can take them from there. The eraser should get pushed firmly on the shaft of the motor.
You can find the motor for the tattoo machine from an old VCR or a remote-controlled car. If you take the motor from a remote-controlled car, you should remember that the power output isn’t high. It is usually only 3.5 volts.
Step 2: Creating the Tube
The next crucial step is creating the tube. The tube gets used to guide the needles. You can make it with a pen or a pencil. Plastic or a mechanical pencil will work fine. If you want, you can also choose a metal pen.
Depending on how long you want the tube, you can choose to cut it or leave it in its original size and form. Most tattoo artists prefer to cut it down to 3 inches or 4 inches in length.
A BIC pen can also get used to making the tube. All you need to do is to remove the ink cylinder from the pen. If you want a short-length tube, you can choose to cut it to 3 inches or 4 inches.
The brass tip of the BIC pen can get filed down so that you can take the ball out. It will make the whole big and ensure that the needle passes through it easily.
Step 3: Designing a Brace
The next step is designing a brace. The brace will provide the necessary support to the tube when it gets attached to the motor. You can use a teaspoon to make a brace.
Break off the bowl of the teaspoon. The bowl is that part we use to eat food from. After removing the bowl, you can bend the remaining part of the teaspoon to form an “L” shape.
If you don’t have a teaspoon available, you can use a toothbrush to make a brace for the tattoo gun. Cut the bristles of the toothbrush. Ensure you have four inches in length of the toothbrush after you cut off the bristles.
Make use of a lighter to ensure that the plastic toothbrush starts bending. When the plastic toothbrush gets heated up, you can bend it to form an “L” shape. You can hold the bent toothbrush handle in place until it becomes cold and stiff and retains the “L” shape.
Step 4: Preparing the Needle
Preparing the needle is the next crucial step. Sewing needles or guitar strings often get used to making the needle. If you want to do precision work, you can choose a single needle. A cluster of needles can get used to doing shading work.
Depending on the type of tattoo work you want to do, you can choose the number of needles you want in your tattoo machine. When you select the correct number of needles, you can reduce the discomfort felt when getting inked.
To make a needle, you will need a good-quality guitar string. Based on the length of the pen tube, you can choose to cut the string at least an inch longer.
You need to ensure that the string length is longer than the tube to reach the center of the motor. Wash the guitar string with soap and immerse it in boiling water so that you can sterilize it completely.
It is advisable to cut and keep many tattoo needles in advance. It will help you save time and money. A single needle is enough if you want to create a simple design. You will need many needles for shading and creating a larger design.
Step 5: Attaching the Tube to the Brace
Remove any lead or eraser from the mechanical pencil. It is the most crucial step in assembling the tattoo gun. The next thing to do is to hold the toothbrush or spoon brace in your hand. Make use of the tape and attach the pen to the brace.
Attach the eraser end of the pencil so that it lines up with the bend of the toothbrush or spoon. When you do this, the point of the pen extends to the edge of the brace.
Always check to see that the pen is securely attached to the brace. Double-check to ensure that the brace doesn’t wobble in any way.
Step 6: Attaching Motor to the Brace
Next, you need to attach the motor to the brace. You should ensure it gets attached straight. Attach the short end of the motor to the brace so that the button gets centered. If done correctly, you will find it along the shaft of the brace.
Step 7: Inserting the Needle
Place one end of the guitar string to slide through the tip of the pen and the tube. When the string of the guitar comes out, you can use the pliers and bend it to a 90-degrees angle.
When you bend the string, it will create a hook at the end of the needle. If you find any extra wire from the hook, you can remove it completely. You don’t need the guitar string to be longer than the tube.
Step 8: Attaching the Needle to the Motor
Set the hook that you have created into one of the holes of the button. When you spin the button, you need to see the needle going in and out of the pen tube. If you find the needle is long, you can trim it to an appropriate length.
If you used an eraser, you would have to create a 90-degree angle of the guitar string. After doing this, you can firmly press it to the eraser so that it stays secure. Keep the needle off-center, and don’t like it in the middle of the eraser.
Step 9: Connecting the Power Source
You can make use of a phone charger or a plug-in adaptor, or any other power source. You should ensure that it has two wires. Split the wires apart so that you can attach them to the motor.
It is advisable to have a small on and off switch if you want to plug and unplug the power source repeatedly. Most tattoo artists switch on and off the machine to clean the skin of their clients.
Step 10: Test the Tattoo Machine
After you have completed assembling the machine, it is best to get it tested. When you try it, you can find out whether it is working correctly. You can also make changes to the tattoo machine based on the test results.
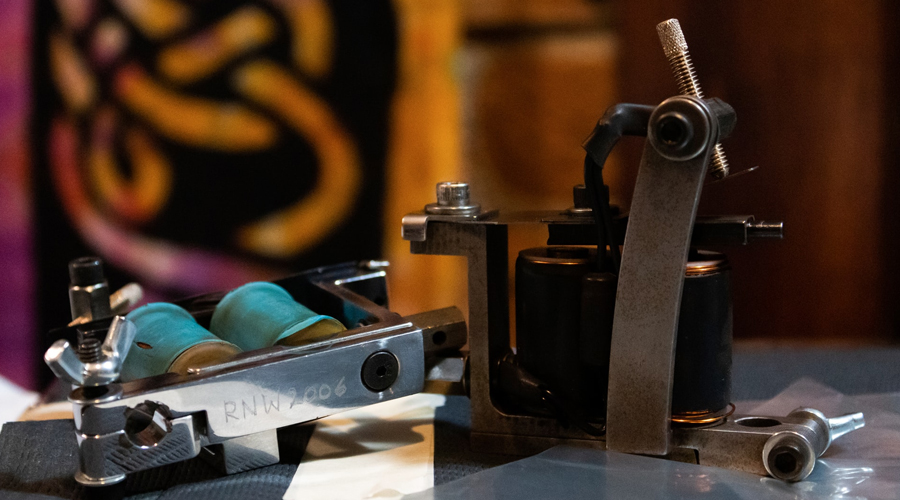
Why Choose a Rotary Tattoo Machine?
A rotary tattoo machine is often the preferred choice of tattoo artists. It is because it enables them to customize the machine and interchange parts easily. The tattoo pen is lightweight and easy to handle. You can use it for tattoo sessions that extend long.
When you start using a rotary tattoo machine, you can reduce the sound and the vibration generally associated with tattoo machines. The rotary tattoo machine is also versatile as you can use it both for lining and shading.
The tattoo pen enables you to create an intricate design and shade you want. It is also light on the hands and enables you to hold it longer. Tattoo artists will find it really useful when they make big tattoos.
What is a Wireless Tattoo Machine?
Suppose you don’t want any wires or other things to come in the way of your tattoo artist, you and choose a wireless tattoo machine. Ergonomic and lightweight, you can use the wireless tattoo machine continuously. One of the best features of a wireless tattoo machine is that they don’t vibrate like a coil-based tattoo machine.
You can also hold them comfortably, enabling you to draw any design you want effortlessly. In spite of having a battery, you will find that the tattoo machine is lightweight and balanced.
On average, the batteries tend to last for at least three hours. You will have to recharge them after this for usage. The design of the wireless tattoo machine is such that you don’t have to worry about its performance and can concentrate on your tattoo artwork.
The wireless tattoo gun is best for a tattoo artist who often travels for their work. The tattoo artist doesn’t have to worry about wires and clips. All that they need to do is to charge the tattoo gun and use it continuously.
Please find an instructional video link here on how to make tattoo guns.
Avoid reusing the tattoo gun after you have used it once. You will have to throw the needle and other materials like a tube and pen to prevent infection. As the materials don’t cost much, you can make the tattoo gun again for use.