main
How to Prepare Clay for Pottery Wheel Fast and Easy
24
Aug
Aug
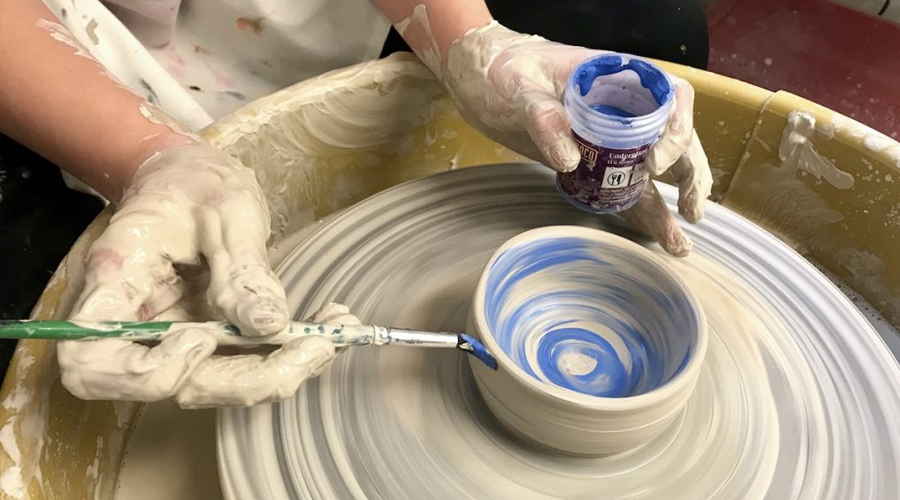
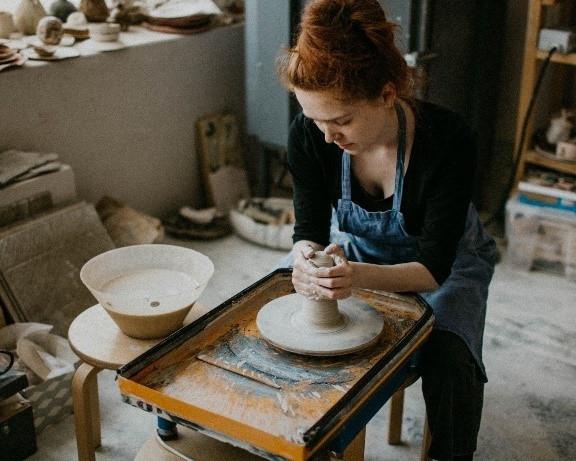
Ever since the first piece of clay was thrown into the fire and modified into a glass-like material, many people use clay for decorative items, domestic wares, and ceramic artifacts. If you love pottery, you probably know that throwing clay on the pottery wheel is not as easy as it sounds.
Centering clay on the pottery wheel can be difficult if you are new to ceramics, and sometimes your pottery can explode in the kiln because you did not prepare your clay perfectly. Wedging is very important when it comes to preparing your clay as it helps remove air pockets and adjust the water content.
The type of clay that you will use for the pottery wheel is also very essential. This article will show you how to prepare your clay for the pottery wheel in a few simple steps. Continue reading.
 Step Two
Gently start wedging the piece of clay by rolling it away from you on the working surface. Push it away from you, then roll it back by applying a little weight to it. This process will help remove bubbles of air from the clay and keep it consistent. Continue wedging the clay for at least 3 minutes.
Step Two
Gently start wedging the piece of clay by rolling it away from you on the working surface. Push it away from you, then roll it back by applying a little weight to it. This process will help remove bubbles of air from the clay and keep it consistent. Continue wedging the clay for at least 3 minutes.
 Step Three
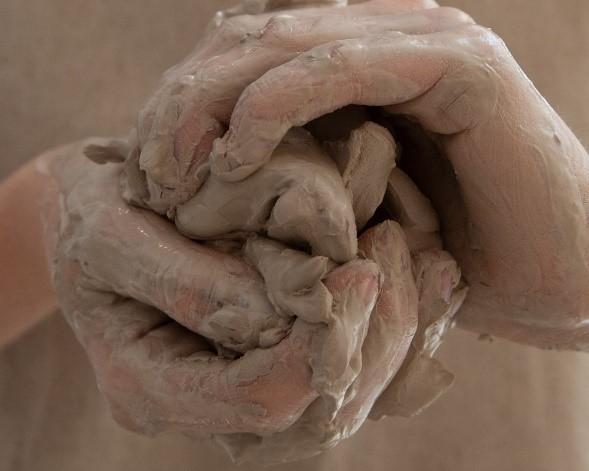
Using the wire cutter, cut the clay into two pieces to ensure no dried clay or air pockets are left inside. If you find air bubbles, you should continue wedging the ball until no more air pockets are present.
Step Four
Once you are sure there are no air pockets left, you should roll the clay together tightly to form a ball. This should be done on a dry working surface. Make sure that you put a lot of pressure when forming the ball.
Step Three
Using the wire cutter, cut the clay into two pieces to ensure no dried clay or air pockets are left inside. If you find air bubbles, you should continue wedging the ball until no more air pockets are present.
Step Four
Once you are sure there are no air pockets left, you should roll the clay together tightly to form a ball. This should be done on a dry working surface. Make sure that you put a lot of pressure when forming the ball.
 Step Five
The ball of clay is now ready to be thrown on the pottery wheel for hand building. Once you are done with your project, but there is still some wedged clay left, you can use a damp towel to keep it moist by covering it.
Step Five
The ball of clay is now ready to be thrown on the pottery wheel for hand building. Once you are done with your project, but there is still some wedged clay left, you can use a damp towel to keep it moist by covering it.
 Step 3
With one hand on the wheel head and the other on top of the clay, gently push the clay upward from the bottom to form a cone shape. Push back the cone down to form a ball and ensure it does not spread out of the wheel head. You will do the same process a few times, depending on the size of your clay.
Step 4
Based on your project, you need to move your hands up and down the center ball and make sure to leave an indent at the top. That will make the work easier when you open up the clay without getting it off the center. If you want to be sure your clay is well centered, there should not be any visible movement in the shape of your clay ball.
Step 3
With one hand on the wheel head and the other on top of the clay, gently push the clay upward from the bottom to form a cone shape. Push back the cone down to form a ball and ensure it does not spread out of the wheel head. You will do the same process a few times, depending on the size of your clay.
Step 4
Based on your project, you need to move your hands up and down the center ball and make sure to leave an indent at the top. That will make the work easier when you open up the clay without getting it off the center. If you want to be sure your clay is well centered, there should not be any visible movement in the shape of your clay ball.
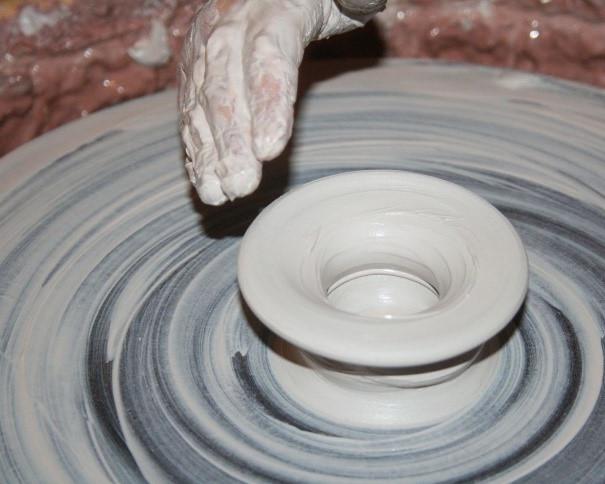 3. Open The Clay
You will gently start to open the clay by placing either your fingers or thumb in the middle of the centered clay. Continue pushing the clay down until the hole is thick enough. The next step will be to pull up the sides.
4. Pull The Clay
When the clay has been fully open, you will start pulling the walls using the clay at the base. It involves pinching the clay at the bottom from inside and outside the pot. This process helps to shape the project that you are working on. There are different techniques for pulling the walls. You can either use a sponge, your knuckles, or your fingertips.
3. Open The Clay
You will gently start to open the clay by placing either your fingers or thumb in the middle of the centered clay. Continue pushing the clay down until the hole is thick enough. The next step will be to pull up the sides.
4. Pull The Clay
When the clay has been fully open, you will start pulling the walls using the clay at the base. It involves pinching the clay at the bottom from inside and outside the pot. This process helps to shape the project that you are working on. There are different techniques for pulling the walls. You can either use a sponge, your knuckles, or your fingertips.
Types of clay used on a pottery wheel
Getting to know the types of clay used for the pottery wheel is very important if you are to get better at ceramics. Although there are four types of clay in total, three of them are more widely used:- Stoneware, usually buff or tan, fires at mid to high temperatures.
- Earthenware has an earthy look and fires at low temperatures.
- Porcelain has a grey-white look and fires at high temperatures.
How to prepare clay for the pottery wheel
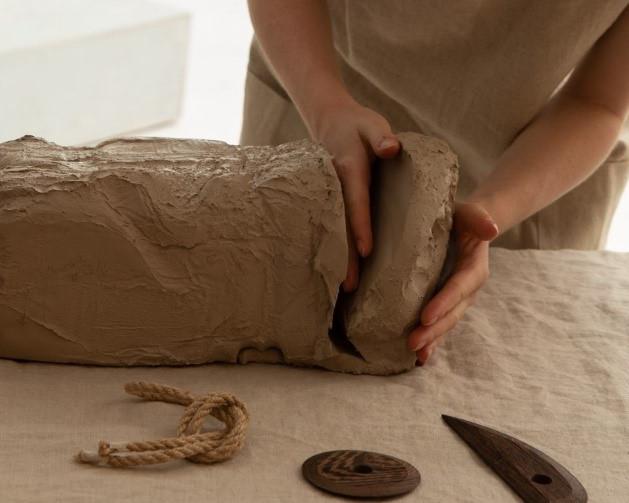
Before you start to prepare your clay for pottery, you will need to have a wire cutter and a clean working surface. Preparing your clay for the pottery wheel can be time-consuming, but once you master the skill, you will have a successful finished project. All you need is patience and follow the simple steps suggested in this article. Always make sure that your clay is free of bubbles and properly wedged. Besides, your work area should also be dry and free from any dried clay. Step One Cut a significant amount of clay from the wedged block of clay that is appropriate for your project. Do this using the clay cutter, or you can also use your bare hands. From the cut piece of clay, form a small ball using your hands.
Step Two
Gently start wedging the piece of clay by rolling it away from you on the working surface. Push it away from you, then roll it back by applying a little weight to it. This process will help remove bubbles of air from the clay and keep it consistent. Continue wedging the clay for at least 3 minutes.
Step Three
Using the wire cutter, cut the clay into two pieces to ensure no dried clay or air pockets are left inside. If you find air bubbles, you should continue wedging the ball until no more air pockets are present.
Step Four
Once you are sure there are no air pockets left, you should roll the clay together tightly to form a ball. This should be done on a dry working surface. Make sure that you put a lot of pressure when forming the ball.
Step Five
The ball of clay is now ready to be thrown on the pottery wheel for hand building. Once you are done with your project, but there is still some wedged clay left, you can use a damp towel to keep it moist by covering it.
How to soften clay for a pottery wheel
Method 1: Grinding and Wetting If your natural clay is hard and stony, you can opt for a mortar and a pestle instead. Start by hammering the hard clay into tiny chips that can fit in the mortar and pestle, then gently crush the hard clay into dust. Mix the dust with water until it becomes slightly thicker. Knead the mixture occasionally, then leave it to soak until it becomes doughy, easy to work with. Method 2: Soaking Natural clay can sometimes be solid-hard, making it impossible to use. Start by spreading the hard clay into a flat loaf tray that has raised edges. Use a mallet or a dowel to create tiny holes on the top surface of the loaf of clay. The holes should not go all the way through. Pour water on the loaf, then cover it with a plastic bag for two days. After that, your clay will be soft enough to use. Method 3: Kneading Polymer clay is made from polyvinyl chloride (PVC), indicating it contains petroleum distillates. So, to make a hard polymer clay soft, you need to knead it or mash it until it becomes soft because this clay responds to warmth and pressure. Method 4: Recuperating Fired polymer clay can get so hard that it becomes almost impossible to re-use, but that does not mean it is 100 % impossible. A pasta machine is the best tool to cut the hard polymer into tiny stripes with the help of a special polymer clay diluent. Alternatively, if you do not have a pasta machine, you can cut the hard polymer clay into stripes using a knife then dilute it with a diluent.How to center clay on a pottery wheel
Step 1 The process starts with a well-kneaded ball of clay that has a smooth bottom. Some people will prefer to wet the clay and the wheel, but it is not necessary. Throw the ball clay in the middle of the wheel, then tap it gently to ensure that it sticks on the wheel head. Step 2 As the wheel spins slowly, you can gently tap the clay to ensure it is at the center. Wet your hands and make sure that your clay is wet all over. You should not add water directly as this will make your wheel tray difficult to clean.
Step 3
With one hand on the wheel head and the other on top of the clay, gently push the clay upward from the bottom to form a cone shape. Push back the cone down to form a ball and ensure it does not spread out of the wheel head. You will do the same process a few times, depending on the size of your clay.
Step 4
Based on your project, you need to move your hands up and down the center ball and make sure to leave an indent at the top. That will make the work easier when you open up the clay without getting it off the center. If you want to be sure your clay is well centered, there should not be any visible movement in the shape of your clay ball.
How to throw clay on a pottery wheel
1. Prepare The Clay Before you start throwing clay on the pottery wheel, you will need to wedge it by pushing it on the work surface. It is the same process as kneading dough, which will help remove air bubbles and give the clay its consistency. Even consistency will make it easy for you to throw the clay on the pottery wheel. 2. Center The Clay Once you are done wedging the clay, you will pat it into a ball-like shape and gently place it on the wheel head. Start centering using your hands until you are convinced the clay is at the center of the pottery wheel, making it easy when you start shaping the ball. Always ensure your hands are wet when you are coning the clay up and down.
3. Open The Clay
You will gently start to open the clay by placing either your fingers or thumb in the middle of the centered clay. Continue pushing the clay down until the hole is thick enough. The next step will be to pull up the sides.
4. Pull The Clay
When the clay has been fully open, you will start pulling the walls using the clay at the base. It involves pinching the clay at the bottom from inside and outside the pot. This process helps to shape the project that you are working on. There are different techniques for pulling the walls. You can either use a sponge, your knuckles, or your fingertips.