Grow Tent
Complete Grow Tent Setup Guidance- Get to know your Grow-Tent
Sep
The idea of indoor plantation and sustainable indoors appeals to you, just not that you are also as much confused as you are fascinated with the concept. The process becomes delightful once the accurate tools are and the grow-tent framework guidelines to up the game. You are the weather in which your plants will grow. The sunlight, air, water, wind that’s available to plants outside are all submerged in your love and affection for the plants indoors.
The indoor gardening system is a simple concept that could get pulled off in a hassle-free manner once you know how to control the environment and create appropriate weather for the plants to grow. The grow tents could only provide for an exterior framework. To let the interior work, we need proper equipment utilized in an organized manner.
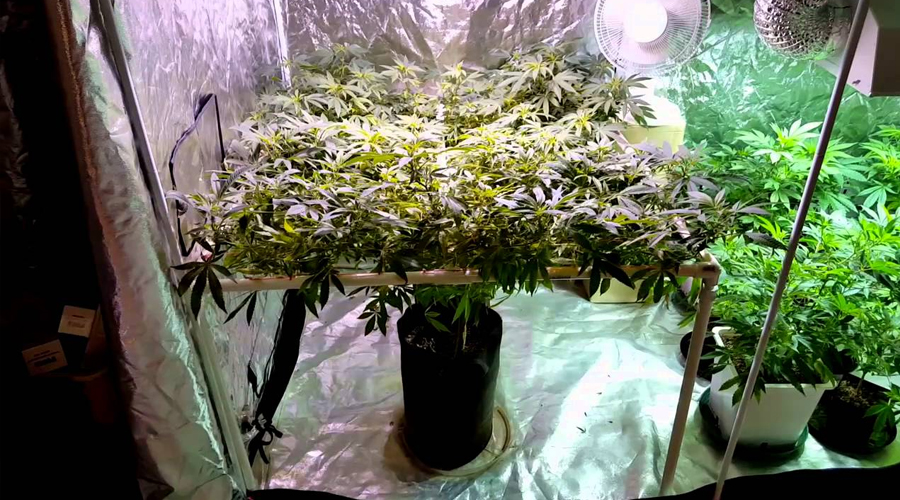
The grow tents provide us with the freedom of recreating nature in a controlled environment. The interior area you choose to set up a grow tent could be an empty room, a shed, an old garage, wardrobe.
Before we answer crucial questions like how to set up a grow tent, how to maintain the environment within the tent, what sort of plants should be, and how to conserve them? We know you are pondering about the significance of a grow tent. So, let’s find:
Why to even go for grow tents?
It helps you control the growing environment that means you can grow plants all year long irrespective of the ongoing season also helps you with hydroponic gardening. The results are much more organized, pest-free, and disease-free.
The biggest key here is complete environment control and optimum utilization of space.
Say goodbye to the fury of having to build a grow room and make most of your space by
effective controlling of an environment which allows you to grow plants with different
environmental needs under one roof.
The method to set up grow tents is relatedly simpler than grow-room since the tents are easily transportable from one place to another.
The cost incurred in setting up a grow tent is negligible compared to that of a grow room. The maintenance part and the sustainability of the tents are unquestionably better than those of tent rooms.
Grow tents are not only conveniently constructed but also could get dismantled with equal ease.
Grow tents reduce the complex steps while dealing with equipment.
It simplifies the installation of ventilation fans with the help of built-in ports available in multiple sizes, built-in light holders, waterproof floor trays, heavy-duty exteriors which are lightproof, punched wire holes.
Now that we are ready to barge in the construction of our grow tents, let’s cast a look at the materials that we need:
Ventilation kit
Can fans, carbon filters, duct clips, ducting accessory.
It’s critical to provide the plants with a proper facility to exchange the air and keep the temperature and humidity in check. Usage of HID lights may raise the temperature making it difficult for the plants to breathe.
Ventilators help plants to cope with excess heat, molds, and humid conditions,smell-proof. Several cool-calculators calculate and maintain an ideal air situation by stimulating the measurement of space and available light in the tent.
The lowest airflow limit is measurable in cubic feet per minute, which gives the velocity of air flowing in and out of the tent.
Odor control:
Sometimes ventilation becomes all the more useful to remove the odor in case of some plants. The pungent smell gets rectified with ipower 6’ ducting, 25, ipower 6’ inline fan, 442cfm, ipower carbon filter.
Grow lights:
Holders, straps, reflectors/hoods, ballasts, timers, power strips are some tools required for installation.
Too much light may lead to the burning of plants placed very close to them. Too little light will hinder the growth of plants.
Light is hands down the most important equipment as it provides energy to the plants to grow and sustain. An optimum amount of light is indispensable to grow healthy plants and maintain the grow tents.
Light equipment needs consideration. If the size of the tent is small(2’*2.5′), the light-system framework should be minimal as a high lighting arrangement could heat the environment and damage the entire framework.
To hold up the lights ratchets on ropes are used where 1/8 rope hangers would be most apt.
While using HID approx. 45-70 watts are necessary per square foot. In the case of LEDs also 400-600 watts are ideal for an area of 3* 3-foot tent space.
Choosing the grow tent:
Careful study of the available space should get conducted before venturing to buy a tent. A proper assessment of the area to be planted should take place. The indoor space selected must meet the standards of hygiene and cleanliness. The vertical height of the grow tent should be enough to maintain a wide gap between plants and equipment.
Have a look at the following link in case you wish to buy a grow tent for yourself!
https://www.amazon.com/AC-Infinity-CLOUDLAB-Controller-Hydroponics/
Fasteners, assembly tools, tapes, humidity gauge, temperature gauge, timer, nails, trellis humidity meter, temperature meter, wire cutters, screwdrivers are some tools and accessories required along with the tent assembling it.
Another crucial selection to be done is of plants and plant supporters.
Along with making the wise selection of an appropriate grow tent, it’s equally necessary to select the plants with equal consideration and research.
Once we are through the selection of space and done with the buying stuff, here comes the most exciting part-
Building of the tent!
The level of excitement in the gut should take a bounce here as we are about to set up the tent.
Here is the step by step instruction guidelines to set up the grow tent:
- Gather the tools
The tools mentioned above should be collected and kept handy as once the process starts losing out on any small instrument could destroy the whole energy and may cost you hours of hard work to repeat the entire framework from scratch. Otherwise, with some helping hand and concentrated effort, the tent will be ready in 30 minutes.
- Assemble the tent
This step is similar for almost all grow tents across different brands, shapes, and sizes. Assembling the tent is a two steps process and is the same for all types of grow tents.
- Making of the frame
- Covering the cloth
Most grow tent kits come with a detailed instruction booklet to assemble the tent. The process takes hardly 5-10 minutes.
It is advisable to seek some help while assembling it as it could be a tedious task for one individual who may end up damaging the tent while trying to manage it entirely by yourself.
The number of individuals working on it could go up depending upon the size of your tent. In most cases, two people can do the assembly part comfortably.
- Grow light arrangement
Here we need some plugs, a timer, holders, and a hood.
Set up the holder and attach the hood. Way out the wire from the timer and plugs. While working HID, it’s required to attach the duct with the closed-hood HID fixture exhausting outside.
Working with LED grow lights is more convenient than HID grow lights. All you are supposed to do is attach the holders with the fixtures, and that’s pretty much it the lights are good to go.
LED grow lights make the ventilation process easy, too. Since the environment remains comparatively cool, it’s not imperative to use a ventilation system is not required.
Rope ratchets are the best way to hang lights. These are pocket-friendly and are risk-free. The fear of falling the lights on the plants is coped with rope ratchets. The height of the hanging lights could get easily adjusted with just a few clicks.
One of the things to make sure of is the strength of the rope ratchet, so opt for the one that could bear twice the number of lights you are planning to hang.
It gives you a better view of plants from all directions allowing the onlooker to click pictures from any angle you want with sufficient light supply.
Another caution is to install the spill tray correctly.
- Ventilation and odor control
A beautiful plant framework may lose its charm due to a pungent smell. Here come carbon filters to your rescue. Hang the carbon filters along with the rope ratchets and make an air-tight line from the carbon filter to the fan ensuring there are no air leaks to prevent the escape of air from the vents.
Hanging the carbon filter at the backside of the tent prevents it from hindering the way.
A complete exhaust system consists of a carbon filter, light framework, and exhaust fan that connects with the help of an air-cooled hood.
- Hang the filter inside the tent.
Assemble the carbon filter in the tent in the desired position. Pointing the tapered end upside, place the inline fan over the filter.
With the help of ducting tape, secure the fan flange inside the filter flange. Join the fan flange with the duct securing it with duct clips.
Find the desired ventilator opening and run the ducting through it.
At the rear sight, the tent runs the fan cord through the nearest cord hole.
- Place the filter outside the tent.
Assemble the carbon filter outside the tent at the desired location.
Repeat similar steps as done while placing the fan inside the tent.
Place the fan flange inside the filter flange, joining the duct with the fan flange secure it with duct clips.
Choose the ventilation hole of your choice and run the ducting in it.
Check out this link if you’re interested in buying ventilation equipment.
https://www.amazon.com/AC-Infinity-Heavy-Duty-Four-Layer-Ventilation
- A quick safety scan
The most important thing to strike out is dialing in. That is the concept of striking a balance between the environmental factors like temperature, humidity, heat force, inflow, and outflow of air with the physical equipment to run the tent operation smoothly and at the optimal environment required.
It’s an advised pre-requisite to run the equipment for a period with or without plants to make sure there are no glitches.
The wires, ropes, and meters should get assessed for their fine run before placing the plants. Check the fastening and security of all the connections. Try to shake the tent to check the stability of equipment and attachments. Make sure the entire arrangement is proper with no loose ends. A glitch is capable of sabotaging your hours of effort.
- Fixing the CO2
One of the most essential and technical steps while installing the grow tent is to make the CO2 available. The process is complex comprising of setting up a room entirely sealed along with a dehumidifier, air conditioner, a burner, and a controller. Equipment’s reliability beforehand should be ensured for its proper functioning so that maintenance of CO2 does not get hampered.
- Hang in an exhaust fan.
It’s best to hang an exhaust fan inside the grow tent, then the distance of fan and light lies in a straight line enabling airflow and circulation to their maximum.
The fan produces maximum sound when hanged outside or placed on the top. The most suitable way to use a fan inside a tent is to sway the fan with the help of nylon ropes or ratchets.
Always allow the fresh air to get in. Near the bottom of the tent, fasten the removable vents to facilitate the in-flow of fresh air.
Check out the following link for grow fans.
- Installation of fan/light timer
We live in a technologically advanced world where automation is pretty much possible in every dimension. Putting a timer for grow lights and grow fan helps us in scheduling the intervals.
Attach the grow light cord with the timer from one side and join the other side of the timer with a power socket.
The fan timer is installed in the same timer as well. Instead of running the other side of the timer through the power socket, join it with the fan power cord.
A timer could operate using a power strip, wall socket of 120V, or extension cord.
Ready with the framework, next?
Now that you have successfully installed the system, here begins the actual game.
It’s time to chalk out several productive methods to cultivate healthy plants. Work upon the nutrient needs of the plants and seeds, work on your hydroponic system. Note the level of ph of your soil.
Make use of a hygrometer or thermometer to check on the levels of humidity and temperature.
In case of hydroponic growing, check the quality of water and ensure it is chemical-free. Use bloom boosters, compost, micronutrients, and other supplements to improve growth.
Above all, have faith and confidence in your ability to choose and build your own grow tent. Remember, equipment and the framework are a part of it. Planters are the bigger picture who has the power and responsibility to give life to the tiny seedlings and saplings. Nurture them, protect them, keep dialing in periodically, and check for pests and diseases. Equipment is just a catalyst adding up to your hard work, your devotion, and care as the backbone of your plants.